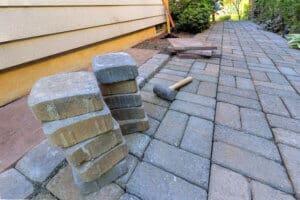
Is your paver patio looking rundown? If you purchased a home with a paver patio constructed a decade ago, its foundation is likely beginning to sag, dip, or crack. Before you pick up the phone to call a landscape contractor to rebuild the patio, consider taking it on as a DIY project instead. Rebuilding a paver patio is time-consuming, but with patience and perseverance, it’s a project you can conquer on your own. Here are a few tips from our team.
 Easy Steps for Rebuilding a Paver Patio:
- Are the bricks damaged? Sometimes degradation of a patio’s foundation can cause bricks to crack. If too many bricks are damaged, you may have to replace all the pavers unless you can purchase enough replacements of the exact shape and size of the originals. If only a few are damaged, you may be able to replace them with a couple from an outer edge and replace those with the closest match you can find. Sometimes homeowners stash a few leftovers from construction near a shed or back fence, so be sure to look around to see if there are extras somewhere on the property.
- Remove the bricks. To do the job right, you’ll need to uncover the entire patio foundation–not just a section here or there. This is one of the most painstakingly dull parts of the whole project. Carefully remove the pavers one by one. Use a wire brush to clean each brick and remove any dirt, sand, or debris. Lay the bricks down in the yard in the same pattern as they were on the patio. This will make them much easier to put them back later.
- Assess and level the ground. Once all the bricks are removed, you’ll be able to see what caused the patio to become uneven. If the foundation was improperly built to begin with (missing gravel, for example), you may need to dig the soil out and create a new foundation entirely. The most common issue is that the gravel under the patio has sunk into the ground unevenly. If that’s the case, our next steps will have you covered.
- Consider any changes you want to make to electrical or plumbing. If you want to add electrical wiring or irrigation underneath your bricks, now’s the time to do it. Depending on your project, you may need to call in a professional and possibly obtain permits. However, making those changes is easier before you put the bricks back down.
- Add more gravel. Shovel new gravel into the area and use a rake to level it. The professionals at Hilton Landscape Supply can help you select the best stone for the job. Use a tamper to solidify the gravel. Use a large level to ensure the rocks are flat. At the same time, achieving a slight slope away from your home is best to help water drain away from the structure’s foundation. Take your time with this step, as a level foundation is critical to a long-lasting paver patio.
- Replace the pavers. It’s time to start putting all those brick pavers back and watching your patio come to life!
- Apply sand. Generously pour polymer sand on top of the pavers. Use a broom to sweep the sand into the crack between all the pavers. Continue to add sand and sweep until all the gaps are filled. Sweep away and discard excess sand. Finally, spray the bricks with water. The water will expand the polymers in the sand, creating a glue-like consistency to secure the pavers in place. Follow the directions on the bag of sand because you may need to repeat this step several times.
That’s all there is to it! By repairing the patio and doing the work yourself, you can easily save thousands of dollars for another landscaping project.
Hilton Landscape Supply Has Everything You Need for Your DIY Hardscape Project
If you want to rebuild your paver patio, make your first stop a visit to Hilton Landscape Supply. Our professional team at Hilton Landscape Supply can help you outline your project and select the best materials to do the job. We have a variety of flagstones and pavers for you to choose from to create your own look. We’ll even deliver your materials right to the worksite. Visit us today to learn more about the possibilities.

 Easy Steps for Rebuilding a Paver Patio: